6 First network project - Simple Chat
We already know:
- how to connect two or several computers from running Imagine environments either locally or through the real Internet,
- how to make use of the net object and its procedures to communicate. We already did this both from the command line and also with the help of a turtle which printed received messages dirctly into the page. To make this happen, we used the onReceive event of the net object.
Now we will connect several computers through the network and step by step build a simple, yet attractive Imagine project - simple chat application. In the same way as before, one of the computers (players) will innitiate the connection by creating the empty Net object in the command line:
- new "Net []
Then he/she will open the Change net1 dialogue box and take the following steps:
- in the Style area check the Server option,
- then specify the nickname, for example Marta, and
- click the Connect button.
From lesson 4 we know that other player can joint the connection only if he/she knows either the IP address of the first player or the name of his/her computer. Let the actual IP number of Marta's computer be 192.168.89.5 (a fictional example, of course). From lesson 5 we know now that there can be several players (in the same room or elsewhere) who may enter the connection in this way.
| A player to join the connection will type in the
command line: new "Net [], then |
|
| Next player to join the connection will type in the
command line: new "Net [], then |
|
| ... etc. for more players. On the Basics tab of the Change net1 dialogue box, each player will specify the onReceive event as print message. | |
Comment: If two or more players specify identical name as their nickname, like Peter and Peter, Imagine will add a number suffix to make them different - like Peter and Peter1.
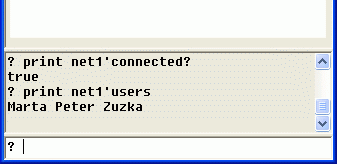
After having clicked the Connect button, you can immediately see on the first tab of the dialogue box whether your net object is connected or not. On the second tab you also see the actual list of all players currently connected. However, you may close the dialogue box and check the same info in the command line by typing in print net1'connected? or print net1'users (we will need this possibility later for programming more complex applications):

In the figure above we see that our connection currently consists of
three players: Marta, Peter and Zuzka.
They can now start the communication from their command lines typing
commands like net1'send

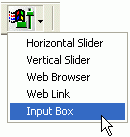
Then open the Change text1 dialogue box and set the background colour, the font and the font colour. Next to the input box create a button, open the Change b1 dialogue box, set the caption to Send and specify the onPush event as net1'send [] text1 text1'setValue ".
First of these commands makes net1 send to all other participants of the connection the actual contents (i.e. value) of the text1 input box. Second command then clears the contents of text1 by setting its value to the empty word. From now on, we will use the text1 input box and the Send button for typing in and sending the messages - instead of the command line.
 |
| First player - Marta - has already typed into her input box the sentence Hello everybody :-) and clicked the Send button. Therefore you can see this sentence in the text screens of Peter and Zuzana as received messages. Peter then typed in Hello Marta, Peter is here! and sent it by the Send button. Zuzana is going to send her message now. |
- First improvement: We want the Send button to do three things when clicked: (a) send the
actual contents of text1, (b) print this message into
my own text screen as well and finally (c) clear text1.
To do so, each player should replace the onPush event
of the Send button to:
net1'send [] text1 print text1 text1'setValue " - Next improvement: We want to see a special
symbol, for example >, in front of my own messages, so that I can
easily distinguish them from received messages. To do so, each player
should change the onPush event of the Send button to:
net1'send [] text1 print se "> text1 text1'setValue "

- Next improvement: We want to see the name of the sender of each received message to appear in
my text screen in front of each message. To do so, we have to modify the
onReceive event of net1 from simple
print message to:
print se word sender ": message
Note that the result of the sender operation is the name of that participant who sent the message.

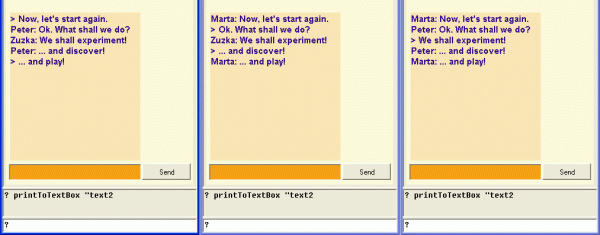
- Next improvement: We have already eliminated the command line as the place for typing in our own messages. Now we want to eliminate the text screen as the place for printing out received (and my own) messages. To do so, each player should use the New Text Box tool of the Main Bar and create another text box above text1 - its name will be text2. Open its Change text2 dialogue box. Set the background colour, the font and font colour. Also, clear the Grow With Value check box (so that the text box keeps its size even if it is full of text). Clear the Editing check box (so that the text box won't be in the editing mode). Then clik the Ok button.
Now we have to redirect the print command into the text2 text box (instead of printing into the text screen). We do this by typing the printToTextBox "text2 command into the command line.

Conclusion
We have built a simple visual interface above the net application which makes it possible to connect to a chat and send/receive messages typed into the text boxes. This simple application illustrates how easily all technical details of working with the net object can be (nearly) hidden.Possible further extensions and improvements
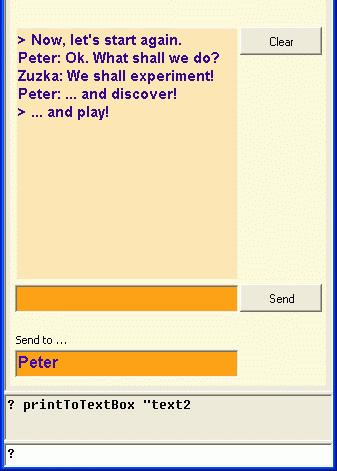
- Add a button next to text box text2, which will clear its contents.
- As a parallel alternative to the Send button (its
name is b1) you may specify a key
menu for the text1 input text box. It will react
to the Enter key in the same way as if you push the Send button b1:
text1'setKeyMenu [Enter [b1]] - (more advanced) So far each participant of our chat has always sent each message to all other participants. However, from Lesson 5 we already know this is not necessary. Add another text box (its name will be text3), in which you can specify the addressees (their nicknames) for your message, see figure below. If you leave the text box empty, it should correspond to the empty list in net1'send [] [ … ]. If you type in for example Peter, it should correspond to the list with one addressee: net1'send [Peter] [ … ]. If you type in more nicknames, for example Peter the list of addressees should contain exactly these participants. To get such format of the contents of the text3 text box, use the expression parse text3 to transform its contents (which is always one long word only) into a list of its items. Modify the Send button so that it sends the message only to those participants that are listed in text3.
